Pages

Showing posts with label free. Show all posts

Monday, March 2, 2020

100th Day of School Valentines Candy Shirt


Every time I’m back in an elementary school I’m rocked by a wave of happy nostalgia - so many happy memories of teaching! Teaching is truly a passion for me and like an athlete revisiting his old stadium, field, or court, it comes flooding back the second I step in the doors and remember being at the top of my game with an audience of mini-super-fans. They were the reason I loved what I did. Them, and my love for all the subjects and all things learning. Those little learners made my day, every single day, five days a week, 36 weeks a year. 


It’s been so fun to have Zoe be in school this year learning Chinese and yet it ignites a flame in me that burns to be back in a classroom teaching and itching to be a fly on the wall following her learning adventures. I feel a little sheepish to admit that I always leave her school scheming ways to land a part-time job teaching art or music or science or something and I may have even contacted her school administrators and my old ones about such opportunities without telling Colby first. 🤫 Shhhh.

Alas, I know the time isn’t right with my health endeavors and everything we have going on, but it’s fun to conspire and relive those glory days for a minute. I've decided maybe I'll fuel some of my unspent passion here into the blog! :) Thanks for being here and reading! 

Today was the 100th day of school in Zoe’s kindergarten class. I had signed up to volunteer and Zoe was allowed to decorate a shirt or hat to wear for it and I completely spaced both until mid-way through the morning! (Thank goodness for afternoon kindergarten in this instance). Fortunately I’m pretty quick on my toes and we already had an idea tumbling in our brains and were able to pull something together. 

If you, like us, happen to have these few easy supplies on hand you can whip out a Valentines- meets-100th-day candy-heart-filled-dispenser-shirt too :) 

What you'll need: 
  • White or Plain Colored T-Shirt
  • 1 or 2 Sheets of Craft Foam or Felt
  • 1 Giant Googly Eye (we got ours around Halloween and repurposed it for this project)
  • Applesauce Squeeze Twist Lid
  • 1 quarter
  • 100 Conversation Hearts
  • Scissors
  • Hot Glue
Assembly was pretty straight forward. We googled a picture of a candy machine to get an idea of the shape we liked. Then we cut out the craft foam, painted the applesauce lid gold, counted out hearts and placed them in the googly eye to see how many fit. We fit about 75 inside, scattered the rest around and glued everything in place with hot glue.

I reminded Zoe that this shirt probably wouldn't last forever and not to melt down at school if something fell off or fell apart. Fortunately it held up and is still in tact today, a few weeks later now, although it obviously hasn't taken a ride through a wash. 

Once I got Zoe out the door, looking adorable in her hand-crafted shirt (it took us less than an hour to whip together) I had 45 minutes to figure out what activity I was going to do in her classroom for the 100th day celebration rotations. I had intended to exercise that morning and then the last minute remembrance of her 100-day shirt hijacked that plan, so deciding to combine purposes and exercise with 27 kindergarteners instead was easy! Boy did I get a good workout too! I whipped out my computer, crafted a quick plan, stayed in my exercise clothes and headed to the school. 

My goal in designing most learning activities (based on what I learned in graduate school) is to engage as many senses and learning styles as possible, so that's what I went for here. I wanted physical learning (hands-on, gross motor, strength & flexibility), plus wanted to throw in some literacy with reading, writing, repetition and sentence structure, and a little math. Some deep breathing, mindfulness, and spatial awareness were a bonus. 


The kids loved it. I loved it. And I felt especially happy about the 100 exercises we did (well 500 for me after 5 rotations! And yes I was sore the next day) since the kids made froot loop necklaces in another rotation and got handed several treats as they were leaving. 

Click here if you want to print this FREE activity for 100 exercises.

Please check out my Teachers Pay Teachers store! I have lots of amazing products for parents, educators and homeschoolers - teaching and creating are my passion and I love sharing with you! If you feel so inspired please pin or share anything you find here.

Sending you lots of love friends!

Wednesday, April 16, 2014

Seriously Spectacular Space Projects


2 Summers ago I saw these little bags of styrofoam balls at DollarTree. They caught my attention instantly because an idea had already been tumbling around in my head for a couple of years but
styrofoam balls from the craft store are ridiculously overpriced, especially when you need about 8 (sorry Pluto :{ ) for 25 or so kids.  

I just couldn't believe how perfect these little $1 bags were.  Each one has 8 styrofoam balls AND 4 of them are small and 4 of them are larger!  Could it be more perfect?  
(Well... actually, yes, I suppose it could, and I did have a little discussion with my kiddos about how these 8 little balls weren't PERFECTLY proportionate to all 8 planets, but they are perfect for approximately representing the 4 inner Rocky Midgets and the 4 outer Gas Giants.) 

Anyway, I'm sure you can see where this was headed.  I saw the bags;  The idea was already brewing and just waiting to burst out of my brain; I had to buy them, that is 30 bags of them.  :)  So there they sat in my classroom cupboard for 2 years waiting for the perfect opportunity to be put to use.  I wanted to use them with my little firsties last year but it just seemed like a little much.  So this year when I switched to third grade the timing was perfect and they couldn't have turned out any more amazing!

WANT TO MAKE SOME WITH YOUR STUDENTS? YOU CAN DOWNLOAD THE INSTRUCTIONS FOR FREE HERE.

I gave each student a little bag of balls and a note of instructions that explained that they needed to represent the sun, all 8 planets, (and Pluto if they wanted), the stars, and the asteroid belt and each celestial body needed to be labeled.  I gave them some ideas for mounting/displayed their project and offered wire hangers for any students that wanted them, but most found their own way and they seriously turned out so awesome.  Can you believe 3rd graders did this?

We left them on display in the entryway of the school and they were quite the hit!  

Some kids cut them in half and mounted them.  Some kids used wires and sticks to mount them.  Some hung them.  
Quite simply: They were amazing.
This one was quite possibly my favorite. It's impossible to tell from this poor phone photo, but she went far above and beyond.  She labeled several stars and even added little labeled moons to the planets with toothpicks.  And of course you can just barely see little Pluto there on the end.  The whole thing was about 5-6 feet long and pretty impressive hanging from our ceiling.


When we were all finished learning about the solar system and completing our Planet Books, (click image to purchase)


and had finished our test, we celebrated by making delectable Solar System Cookies. 

I haven't quite caught back up with blogging/teaching/mommying/and creating teaching projects... so I don't have a picture of the 3rd grade cookies from this year, but here's one from a few years ago.  You can check out more details about the cookies and a few highlights of our Space activities from last year here.  


Friday, April 11, 2014

Hooray for the Humans...Part II

Since our little angel was born I have been busy with returning to teaching half-day, adjusting to life as mommy and teacher, and settling into our new home.  My third graders and I recently had a blast learning about the Human Body.  We used the Human Body Book that I created last year, 
  
and of course displayed the Human Body System Posters I created. 

Plus we added lots of fun new things to our learning! 
Unlike last year, we didn't have access to real-life skeleton so we had to settle for this little guy that the 6th grade let us borrow:

Like most, my kiddos love everything hands-on.  They were so fascinated with the human body and all of it’s amazing systems and I wanted them to have the opportunity to CREATE something to help solifidy their understanding of each system and its parts so I created this Human Body System Craft Book.  We used common household/classroom items to represent the different parts of the system (for example – little pink water balloons for the lungs, gold pipecleaners for the nerves, and a sponge for the brain).  When we finished learning about all of the systems we bound them in a book and wow, they look fabulous!  What a neat learning souvenir. 
 

You can purchase the Human Body Systems Craft Book here.  It includes a materials list and instruction page for each system, as well as a template for each body system, covers for the book and pictures of the completed crafts.

Of course we also made our little body system paper dolls (the kids LOVE them) before we took our test.  


Want a copy of the study guide and test I used?  You can download it for free here:


 And I had a wonderful TPT follower ask if I could provide her with the Human Body System Posters so she could translate them into Spanish.  Well… since I work in a school with a Spanish emphasis and LOTS of great Spanish-speaking teachers I went ahead and did it myself (with their help of course) and you can purchase those here if you’re interested.  They are PERFECT for Spanish-speaking schools or Spanish-immersion schools where science is taught in Spanish.  I hope somebody finds a good use for them!


Friday, July 19, 2013

123... ABC {A Plush, magnetic alphabet crafty tutorial}


Now that summer school is done, and for the first summer in a few years I'm no longer working on my masters degree I have found myself with LOTS of crafty nesting time (see here just in in case you missed the announcement). While perusing Pinterest (yes, very productive use of time... I know) I saw this adorable magnet board with magnet letters on it: It was love at first sight.
DIY Magnet Board in kids room with fabric magnetic letters.
(click the image to view the original source)
I followed her link to check out the alphabet on Etsy but I just couldn't swallow spending $50 on it, adorable as it is.  So I determined I would make my own.  Now be warned.  I am a VERY amateur sewer (I don't even dare venture use the word "seamstress".  NO way!) And this project is not for the faint of heart, nor can it be done in a jiffy. Hopefully these instructions are of use to someone :)

Materials:
lowercase alphabet block letter template (free PDF)
26 fabric scraps (~4x4in)
26 Batting squares (~4x4in)
26 Felt squares (~4x4in)
52 1/2 in. diameter magnets
1. Select your fabric scraps.
(I arranged mine by color for a rainbow-ish effect to help my baby girl learn the sequence of the alphabet as she visually sees the color scheme in order).
 2. Create or print your alphabet template on cardstock.
(I chose lowercase letters because as all you early-childhood teachers know MOST of the English language is represented with lowercase letters.  Simply learning to recognize the letters by name, while helpful, is a far cry from learning to read.  That is why I always begin by teaching the sounds of lowercase letters before names or introducing capital letters.)

 3. Cut out your template and lay each piece with it's corresponding fabric.
(I used an exacto for the center of the tricky ones).
 4. Cut the fabric, batting and felt into approximate rectangles/squares for each letter.  Layer them in that order. Make sure you have at least a 1/4in. edge of fabric, batting, and felt around each letter.
(I considered using the same fabric for the backs, but ultimately decided on black felt to make it easy for baby girl to recognize the front and back of the letters).
 5.  Now I know I'm breaking lots of true seamstress rules here... but I didn't bother to pin OR trace my template. I know, I know.  Shame shame on me! I simply used the letter template as a guide and stitched through the fabric, batting and felt, making sure they all stayed aligned, and making sure to backstitch as I went.  If you're not as inclined to wing-it as I was, then by all means pin and trace away! But wait!  Don't forget the magnets!  I almost did, a few times in fact.  Think carefully about where to place your magnets.  They must be balanced on opposite sides of the letter or somewhat centered, otherwise the weight of your letter may cause it to hang crooked.  I found it was easiest to DECIDE where to put my magnets before I started sewing, THEN sew the letter ALMOST all the way (without the magnet), and finally stick them in at the last moment, and then finish up the last few stitches.
6. For those fun letters with the holes (a,b,d,e,g,o,p,&q) sew the outside edges and place the magnets first, then sew the inside of the letter (this part can be tricky!) and then finally cut out the center once the whole thing is sewn.
7. Trim all the excess around the edges and another letter is done! With each completed letter I found myself feeling happy and triumphant. Hopefully you do too.  When they're done, hang them on you refrigerator, a magnet board or a filing cabinet and admire them to your heart's content.  Hooray!


PS - I just have to add that after completing my alphabet I COMPLETELY understand why these are around $50 on Etsy. If I were selling I would have to charge at least $100 to make it even remotely worth my time. So go make your own and have fun!  Let me know if you do, I would love to see pictures!

Saturday, February 9, 2013

Bubbly Valentines {Freebie!}


 Around Christmas time, (or it could have been after - it's all kind of a blur you know) I picked up these cute little bubbles at Michaels.  They came in an 18 pack for $2.50 and I knew they would be perfect for some little student gift or another.  
Well... I've found the perfect use for them.  Valentines!  (What 6, okay, maybe 7, year old really needs more candy after Halloween, Christmas, and Valentines all packed into 4 months?)  

So I whipped up some bubbly little cards and went about assembling my valentines.  I didn't have any cardstock on hand so I glued them to colored paper, but that is certainly not necessary.  Feel free to pin or download the template here.  (Please follow my blog if you do).  You could use them with wedding bubbles (also found at craft stores) little bubble jars (found at the dollar store) or even bubble gum! 
 
I've been so excited to share these, I just had to link up!  I've joined Teresa's linky party over at Fun in K/1, DoodleBugs Five for Friday, and Mrs. Lilypad's Little's Valentine Linky Party! Go check them out and link up!
On Friday my kiddos starting making an adorable valentines craft for their parents, but we had to leave it in-the-works, so stop back soon to see it.  It's so cute and so easy you don't want to miss it!
(I also recently posted free February scrambled sentences - check out this post if you want to download those.)

What do you do with your kids for Valentines?

Do you have a blog post about Valentines?  I want to see it!  Leave me a comment and a link to it!

Wednesday, November 21, 2012

Fact or Opinion Pack Common Core Giveaway & Thanksgiving Freebie!

Thanksgiving!  No work.  Family time.  Good food.  More holidays just around the corner.  Who could ask for anything more?  I LOVE it!  Well, I'm gonna make this a quickie, but my school has been having Common Core training for the last two days. The kids got lucky and got the whole week off.  Meanwhile, I've been thinking all about the increased emphasis on vocabulary and writing the Common Core brings and I decided to start in my classroom with this Fact or Opinion pack.  There are several fun activities including a whole class fact/opinion sort and an individual student sort, plus practice writing facts & opinions, interviewing others about facts & opinions, a game, and a quiz.  I can't wait to use it with my students.  I think it will be the perfect introduction to writing paragraphs and supporting them with facts and opinions.  I also tried to integrate Tier 2 vocabulary from science and social studies to review throughout the whole pack.  If you want to snag it click the image {or here}.  Just like last time I'll give it away free to the person of my husband's choosing who leaves a comment & their e-mail address.  So leave a comment already and tell me how you teach facts & opinions to your kiddos!  (If you want to see the cute edible fruit turkey I made for last year's big dinner click here... and if you're interested in seeing an earlier post about the Pilgrims and Thanksgiving with freebies click here.)  Happy Thanksgiving!!! 
Oh yes, last but not least, I almost forgot (and I know it's a tad late now, but stick it in your file for next year) here's the Thanksgiving Syllable freebie I made.  Hope you enjoy!  {Click the image to download}.

Tuesday, November 6, 2012

PTC freebie and An Abbreviation & Punctuation Education

Tomorrow and Thursday we have parent teacher conferences from 2-8pm at my school.  I'm always a little nervous going into the first one of the year because usually I don't know the parents well enough yet to gauge which type of parent they are.  Are they the "What, my child?, no! He/She can't possibly do anything wrong!" type or the "What did he/she do now? Oh yeah, he/she does that all the time at home" type, or the "Thank you SO much for everything you do for our child! What can we do to help him/her succeed?" type?

I really enjoy  meeting with parents and forging positive relationships and even friendships with the united goal of helping my students succeed.  Its always fun to meet the parents too because you can always see where each child gets of their habits/traits/mannerisms/behaviors, etc. I'm sure glad that we get a day off afterwards though because 26 conferences in 2 days, fifteen minutes apart, back to back after teaching all day is EXHAUSTING!!   
 Last year I thought it would be fun to have my students write their parents a letter and leave it on their desk for them to find when they came to parent teacher conferences.  On the side of the paper facing up they created a riddle with clues about themselves and a self portrait, and on the other side they wrote a letter to their parents all about the things they had been learning in school and said thank you to their parents for supporting them in their education.  
When the parents come I also have a form for them to write a quick note to their child to leave on their desk.  They kids LOVE finding the note the next morning and reading it to themselves. If you want to download a free copy of either form just click the images. 
We have been working on identifying and writing all different kinds of sentences in my class.  After reviewing  our beginning of the year NWEA Map test data I decided we needed to practice abbreviating and punctuating so I created this unit. Click the image or here if you want to check it out on TPT.  It has LOTS of fun things to practice and my students have been loving it.  Today we worked on our punctuation flap book and they thought it was the. coolest. thing. ever.  Haha.  I love it.  The simple joys.

Anyway, leave me a comment and let me know what tips you have for parent teacher conferences and I'll give the unit away FREE to someone who leaves a comment and their email address.  {I'll let my husband choose who :) }

Tuesday, October 30, 2012

The Cat in the Hat Comes Back {freebie}

You've probably seen the adorable "Desk Fairy" idea all over the wild, wild web.  When I first saw it I loved the idea.  When I decided to do a Dr. Seuss theme with my classroom this year (click here if you want to see pics) I thought it would be perfect if instead of a "Desk Fairy" the Cat in the Hat secretly sneaked into our classroom at night to periodically inspect the desks.  
 
My kiddos have been LOVING it.  They are so excited when they walk in to discover the Cat in the Hat left an award, a poem, and his hat on someone's desk.  Their favorite part is that there's always a treat hiding under his hat too!  You wouldn't believe the wonders it has done to their desks!  Suddenly first graders can keep their desks so immaculately clean!

The little guy's desk box pictured below was just one of almost the entire classes' that looked like that!  Now I have happy, organized kiddos and they have a very happy Cat in the Hat (shhhh don't tell!) teacher.    

If your kids have papers and pencils and crayons and tissues and who knows what else coming out the wazoo of their desk you have GOT to try the Desk Fairy or The Cat in the Hat.  You can download my poem for free below.
You can also start helping them get organized by collecting lids from the zillions of boxes of copy paper that your school (most likely) inevitably goes through.  Which, by the way, was a brilliant idea that some genius before me thunk up! Oh the things you can think if only you try!!! 
How do you help encourage your students to keep their desks clean?
Feel free to check out my Dr. Seuss classroom theme too if you're interested. (Click image)

Monday, September 24, 2012

Oceans Galore!

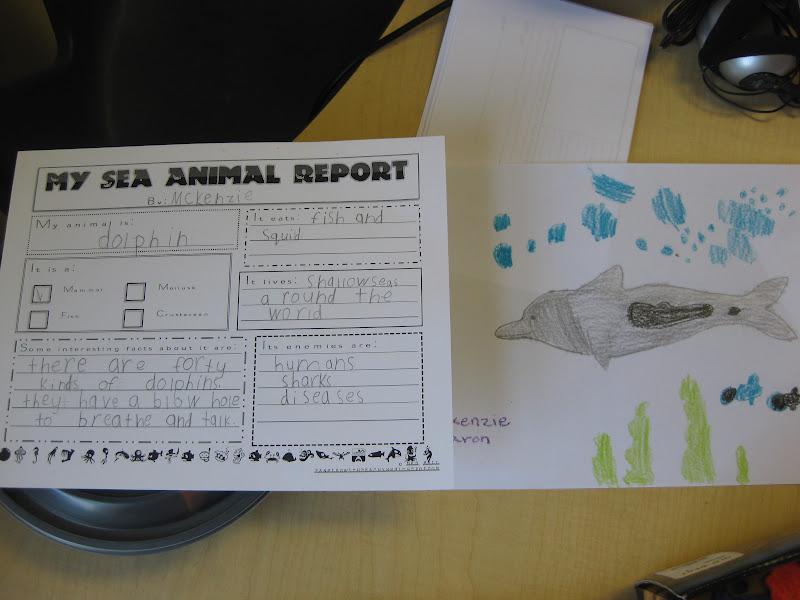
We've been learning all about animals and habitats and just finished a unit on the oceans.  The kids loved it and were each assigned to do a sea animal report and model. They were so cute, clever, and creative.  I loved seeing all of the different ideas they came up with.  
 We had clay and sand...
 rocks, felt, and paint...
 salt dough...
 water colors
 more clay
 drawings
 SQUASH!  How clever is that?  I loved it.
painting and lots more!  As a culminating activity we made these fun fish-bowls with paper plates, sand, and cellophane.  The kids loved it. We got in some good counting practice waiting for the plates to dry because I told them they needed to hold them together and count to 100 twice :) hehe.  


So cute.  

If you want to download the sea creature report form and other ocean writing pages for free click here.